
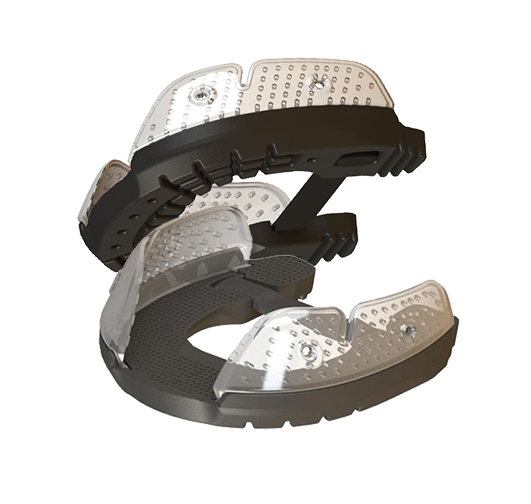
Hoofstar™ Glue on Hoof Boot

Everything you need to know about the new Hoofstar™ Hoof Boot.
If you have been a horse owner for any length of time, you have probably tried various methods to keeping your horse’s feet on the straight and narrow. And, if you have ever had a horse with foot problems, you know that this is a delicate and sensitive issue to figure out. There are so many options out there from traditional metal shoes to barefoot trimming. Maybe you have even thought about or tried composite shoes or clamp on boots. There is something out there for pretty much any situation you can find yourself in, but today we are going to talk about the exciting new Hoofstar™ glue on hoof boot.
It is considered one of the easiest glue on Horseshoe / Hoof Boots on the market and can be easily applied by anyone.
This boot is an exciting new option in the arsenal of shoeing options. It provides great shock absorption and can be used for anything from the weekend trail ride to endurance riding. It can also be used to address and help hoof problems.
Here are some key advantages:
Here are some of the key Advantages:
- A true Glue On Composite Horseshoe / Hoof Boot.
- Quick, clean and very simple to apply.
- Easy to fit and can be glued-on by anyone that is willing to give them a try.
- NO special tools or training required.
- Adjustable to most common hoof sizes and shapes.
- Perfect for the anxious or noise sensitive horse.
- Ideal for horses with pain issues, as the feet are not expected to be held up during gluing and bonding.
- Flexible and shock absorbing without a steel or aluminum core which assists in protecting joints, tendons, ligaments
- No restriction of natural hoof flexion and mechanical function.
- These horseshoes will last one full shoeing cycle, ranging from 6 to 8 weeks.
- No damage to the integrity of the hoof wall.
- The Glue will fill-in Hoof cracks and even repair missing hoof walls at the same time.
- Ideal when transitioning your horse from steel-shod to barefoot.
- Designed and produced by a farrier with a Masters Degree in Mechanical Engineering.
The application is easy!


Step 1: Roughen the hoof surface
The best way to do this is with very coarse sandpaper. Lift up the hoof and sand the hoof wall once. It's best to use a HOOF-it Hoof Stand so you can work under your horse with ease.In order for the glue to adhere well to the hoof, the surface will need to be roughed up.
Step 2: Drying
The Hoofstar horseshoe will only adhere optimally if the hoof is dry. Depending on the season and housing conditions, your horses hooves may be wetter or dryer. If the hoof feels moist, it must be dried before applying the glue.
To speed up the drying process you can use a heat gun or hairdryer.
Step 3: Adjust the bridge
With your Hoofstar horseshoes you will receive adjustment bars. This will allow you to adjust the heel for a custom fit.
To determine which bar to use, place the shoe on your horses hoof and choose the bar that provides a snug fit.

Roughen

Dry

Adjust Bridge
Step 4: Insert the bridge
After you have determined the correct bar to use, take the shoe off your horse and snap the bridge in place.
Step 5: Sizing & Adjustments
In certain situations, you may have to adjust the length of the shoe. This is easy to do with a pair of nippers or a grinder. While the shoe is on (but before you have glued), trace the back of the hoof with a sharpie and then remove the shoe and trim accordingly.
Step 6: Slide
Once the length and width of the shoe is perfect for your horse, it's time to glue them on.
To do this, put the shoe back on your horse and then wrap the hoof and shoe with the adhesive film. Six to seven wraps are enough. Since only the side walls are glued, the bottom does not have to be completely covered with adhesive film. When you're done, you can put the hoof back on the ground. Do the same with the second hoof.
Step 7: Finding the filling holes
The Hoofstar shoe has 4 filler holes for the glue, two on each side wall. Feel for the holes and pierce a small hole in the adhesive wrap so that the glue can be injected. You can do this with a hoof pick or other non-sharp object.

Prep Glue

Clear Injection Hole

Apply Glue
Step 8: Prepare glue
Insert the adhesive cartridge into your dispensing gun.
Then remove the plug of the cartridge and remove the screw cap. Extract a tip full of glue from the cartridge to ensure that both components are evenly mixed, then put the mixing tip on. Remove the cap and you are ready to apply.
Step 9: Gluing
Place the tip into the first hole and inject. You will want to move quickly as the glue will set fast. The temperature outside will determine how quickly the glue will set. If you feel you need more working time, or you are working in extreme heat, keep the glue cartridge in a cool dry place before applying. Fill all 4 holes with glue.
Step 10: Curing
For optimal adhesion, allow your horse to stand for 10 minutes before you remove the adhesive wrap. Your horse is now free to move about.
That’s all there is to it!
The longevity of these shoes will vary depending on the conditions that your horse is in and what you are using them for.
